 one-key flash test 190 series
 one-key flash test vertical series
 one-key flash test splicing series
 one-key flash test horizontal series

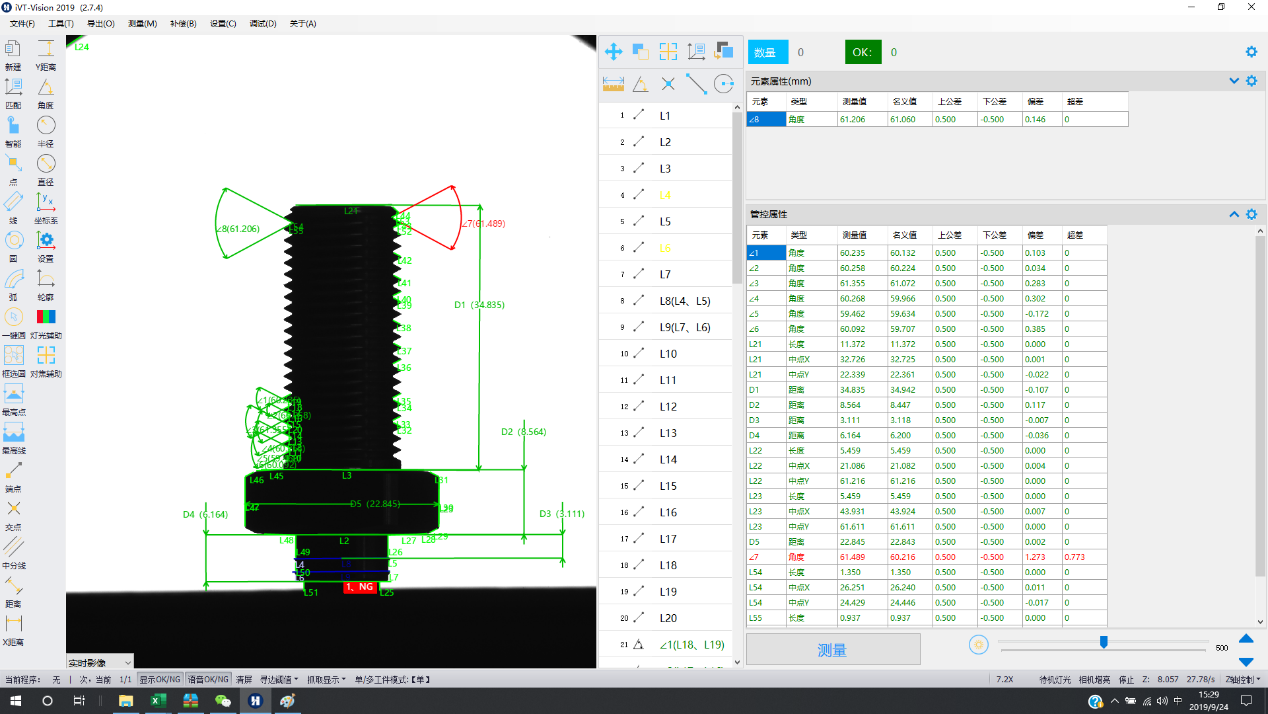
Taiwan's independent research and development, software interface simple, powerful, easy to learn; The distortion correction technology independently developed by our company ensures stable and accurate measurement results at all positions and angles of the field of vision; The self-developed image mosaic technology ensures that the mosaic error is less than 0.003mm.

lBreak the traditional measurement tools, accurately measure data on both sides;

lLarge aperture and high depth of field, achieve clear imaging in the whole field of view, without distortion, and accurate measurement of data on both sides;

lThe software adopts advanced 20:1 sub-pixel image edge processing;

l Efficient batch measurement range can measure more than 20,000 sizes at one time, and the measurement time for 100 sizes is less than 1 second, which greatly shortens the measurement time and improves the measurement efficiency;
l Accurate flash test, which will be triggered at any moment;
l Arbitrary placement of multiple workpieces, automatic identification, batch measurement;
l High-resolution cameras, adopting high-resolution digital cameras with 12 to 43 million pixels;
l Least squares regression processing can automatically remove burrs and abnormal points, and minimize the impact on feature positions
l Automatic image matching function, measurement workpieces can be placed arbitrarily, no positioning fixtures, no focus adjustment, no manual operation of the stage;
l It can realize the measurement of multiple positions of the workpiece, increase the measurement size, and it will not consume more measurement time;
l Multiple workpieces can be measured at the same time, without a single measurement for each workpiece;
l Simple operation, can quickly complete all measurement processes, and output measurement results;
l The image is focused clearly within 2 seconds, with high consistency of repeated focusing and zero errors;
l The measurement is accurate, and the measurement results will not vary from person to person;
l The measurement process does not require platform movement, which effectively prevents measurement errors caused by product displacement;
l Anti-vibration platform design and integrated structure to ensure the rigidity of the instrument;
l The ergonomic design allows the surveyor to have a comfortable measuring space;
The measurement results can be automatically saved to the host;
Model | KX100W | KX120W | KX190W |
Measuring stroke (mm) | 82×55 | 120×80 | 190×126 |
R axis movement method | Automatic | Automatic | Automatic |
Optical lens | Double telecentric optical lens | Double telecentric optical lens | Double telecentric optical lens |
Depth of field (mm) | 80 | 80 | 80 |
Image sensor (pixels) | 200 M | 200 M | 200 M |
Measurement accuracy (μm) | ±(2.5+L/50) | ±(2.5+L/50) | ±(2.5+L/50) |
Repeatability (μm) | ±1.5 | ±1.5 | ±1.5 |
Minimum display unit (μm) | 0.01 | ||
Z axis movement range (mm) | 50 | 30 | - |
Dimensions (mm) | 900x200x460 | 1050x300x560 | 1700x680x1300 |
Weight (KG) | 30 | 40 | 385 |
Weight bearing (KG) | 5 | 8 | 10 |
Working Environment | Power supply: 220V/50Hz Vibration:<0.002mm/s, <15Hz Temperature: 22℃±5℃ Humidity: 20~80% | ||
1 | Host | 1 | Host | Body and base (Z-axis automatic lifting) |
2 | Camera system | 20 million class high-definition camera | ||
3 | Lens | Double telecentric large field of view optical lens | ||
4 | Controller | Taiwan dedicated measurement controller | ||
5 | Light source | Telecentric parallel contour light (automatic lighting and fill light) | ||
2 | Computer | 1 | Computer | AOC all-in-one computer |
3 | Software | 1 | Basic Software | Taiwan VISION measurement software |
Remarks:
①Special models and software functions can be customized
②Optional fixed working platform
Taiwan's software advantages:
Taiwan completely independent research and development, the software interface is simple, powerful, and easy to learn; the distortion correction technology independently developed by our company is used to ensure stable and accurate measurement results at various positions and angles of the field of view; the self-developed image stitching technology guarantees stitching errors Less than 0.003mm.

a. User program:
Automatically match the workpiece, place it arbitrarily, and measure with one button. Can automatically search for matches and call out the user program. Frame selection can be used to establish a match, multiple position frame selection combinations can be used to establish a match, measurement elements can be used to establish a match, and CAD can be imported to establish a match. A program group can be established to realize the measurement of multiple sides of the workpiece.
b. Comprehensive measurement elements:
Point, highest point, line, highest line, circle (center coordinates, radius, diameter, roundness, circumference, area, maximum radius, minimum radius), arc, rectangle (center coordinates, length, width, circumference, area) ), ellipse (center coordinates, major axis, minor axis, circumference, area), keyway (center coordinates, length, width, circumference, area), import CAD contour scanning comparison, contour PV, area comparison, cylindrical diameter, Sealing ring (calculate the radius from the circumference, the maximum radius of the sealing ring, the minimum radius, the thickness), the measurement result recalculation (maximum, minimum, average, sum), two-dimensional code recognition, barcode recognition.
c. Marking:
Distance, X distance, Y distance, radius, diameter, angle, etc.;
d. Evaluation of shape error:
Straightness and roundness.
e. Position error evaluation:
Parallelism, perpendicularity, symmetry, concentricity, and position.
f. Coordinate system conversion
Cartesian coordinates (X, Y) and polar coordinates (R, θ) can be easily selected. The basic unit mm, inch, and mil of the measured value can be converted instantly. Coordinate translation, coordinate rotation, establish a workpiece coordinate system.
g. Measured data
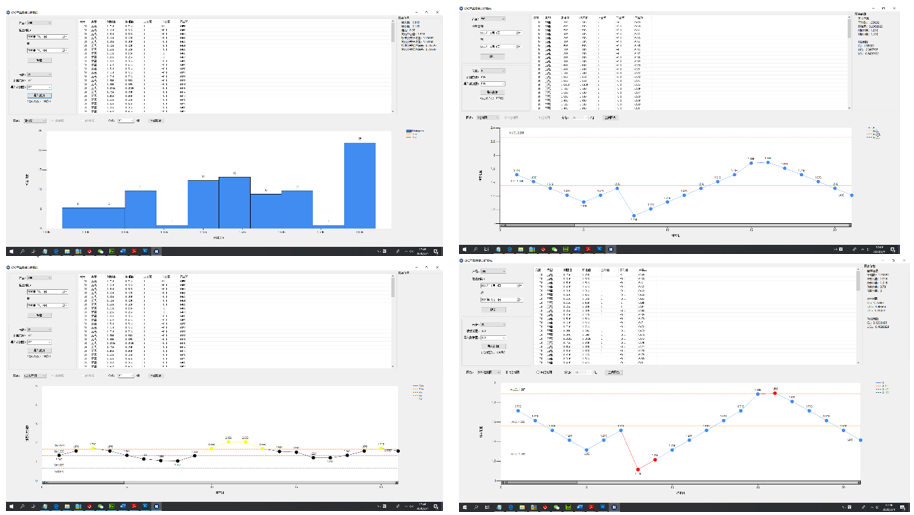
You can customize the EXCEL template and specify the output cell. The software comes with a CPK template, which can calculate Mean, Maximum, Minimum, Cp, Cpkl, Cpku, Cpk
h. SPC data analysis function
Including: histogram, Cpk trend chart, X control chart, Xbar-R control chart, Ximedian-R control chart, X-Rs control chart.

i, other
·Software language: multi-language is optional, language packs are open, translation modification can be defined
·Image and drawing area are shared, WYSIWYG, customizable: color, line width, font size, background color
·Focus assist, light assist function, reduce human error
·Pass/Fail (OK/NG), and alarm prompt, voice output: OK, NG
·Can quickly scan contours and export to CAD
·Optional IO card, external trigger measurement and OK NG signal output
Host | 1 | Host | Body and base (Z-axis automatic lifting) |
2 | Camera system | 20 million class high-definition camera | |
3 | Lens | Double telecentric large field of view optical lens | |
4 | Controller | Taiwan dedicated measurement controller | |
5 | Light source | Telecentric parallel contour light (automatic lighting and fill light) | |
Computer | 1 | Computer | AOC all-in-one computer |
Software | 1 | Basic Software | Taiwan VISION measurement software |